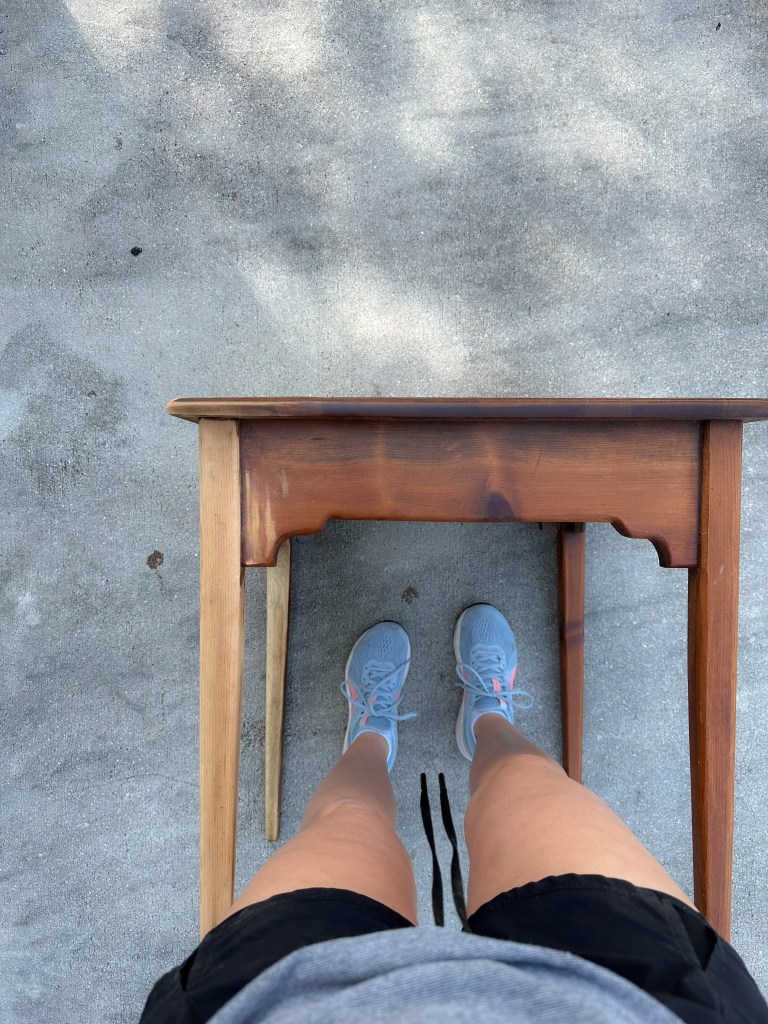
I have a problem. It’s not life threatening or anything, but it’s a problem all the same. You see…I really love furniture. And we happen to live in a spot where people put furniture out on the curb all the time. For free. I call it Picking Day. Other people call it Trash Day. Every Monday in our neighborhood is Bulk Trash day. You can literally put anything out on the curb that you don’t want. And sometimes I get very lucky and find myself in the right spot at the right time and someone else’s trash finds it into the trunk of my minivan. This is only a problem in that we do already have a house with furniture so I often find myself shifting things around, making work for myself that I don’t NEED to do. It’s a problem, but perhaps I should call it a hobby.
I can’t even tell you how many things I’ve picked up on picking day. I’ve outfitted our house with these finds. But sometimes they need a little help. And that’s when my little hand sander comes in. Honestly though…Every time I sand something I say I’ll never do it again. It’s the actual worst. But I’ll also say that I never regret it once it’s done.
I did share about this on Instagram a few weeks ago, but thought I would save it here for future reference. Am I the only one who finds it terribly difficult to find something on instagram if I forget to take a screenshot in the moment?? I can’t be. Much easier to look at a website for future reference!
Sand with 80 grit sandpaper followed by 120 and 220 to smooth using a detail sander or a random orbital sander. I used my detail sander for this one with its straight lines but for a larger piece I would probably recommend an orbital. An orbital sander just has more power than the detail sander.
You may have to get in the curves, nooks and crannies a bit by hand. Keep going until you’re happy with the color and finish. Mine had these dark lines where the previous stain had seeped in very deeply. I just kept sanding until they were gone.
At this point you could apply a new stain in a different color. I liked mine as it was, so I next just finished it with clear matte polycrylic applied with a sponge brush. Matte means it won’t have a shine when it dries.
A note because there may be questions: I have tried the oven cleaner method on a couple things and it does work in taking off stain, BUT I feel that it damages the wood. It seems to sort of shred the wood finish while taking the stain out. Just stresses me out for my poor wood pieces. Not to mention all chemicals in oven cleaner. I prefer sanding because it freshens up the look while making it like new again. However, if you have a piece of furniture with lots of nooks and crannies – oven cleaner may be a good place to start for you. Curves and corners are notoriously difficult to sand! There’s also always citri-strip! You might have great results with that too! But for me – I have ended up having to sand even with other stripping methods. So you may have to do a combination of things if you have an orange-y gal laying around like me that could use an update!
Hope those tips and the process are helpful in case you’re not sure how to update your wood pieces!
One thing I’m often asked is “How do you read so much?” It’s true that I do work full time as a teacher, have three small children, cook dinner every night, and keep the house looking fresh (most of the time). Now friends, it would be laughable to list all those things without saying that I have a hugely present and supportive spouse who is my partner in all things of life. It’s not like I’m doing “it all” alone. But in between doing “it all” with my sweet husband, it’s true that I will forever find time to read. Every day, no matter what. Now, listing all those things sounds a little braggy – Look how productive I am! Look how full my life is!” But I don’t meant it that way in a bit. I just mean, that you can do it too, even if you feel like you have a list of to do’s that never get done (we all do), even if you have a small child hanging off of you (me too!), a partner you want to give your undivided attention to at the end of the day, or a kid who desperately needs you in the next room (MAMA MAMA!). You could find time.
Choose a book over scrolling. I am definitely a creator online, but I am not much of a consumer. I have maybe 4-5 people I like to look at on instagram, and I give myself 15 minutes every night to scroll Pinterest, but other than that – I don’t watch reels, I don’t scroll feeds. I don’t watch stories like a tv show. Put the phone down, and pick up a book instead.
Get multiple versions of the same book – get the print copy, the audio, and the e-book. I mostly do a combination of listening to books (while shelving, driving, or running) and reading the print copy (at night, in bed, on the couch, or while monitoring my kids). And for goodness sake – don’t pay for any of it! Get them all from the library. It seems greedy to use all of the versions, but if no one has it checked out then you should. Libraries buy books so that people will use them. Just return as soon as you are done and you don’t have to feel guilty.
Bring your book with you wherever you go. Get a purse or backpack large enough to carry the print copy. Or learn to enjoy reading the e-book version.
Place holds at the library. I just shared a long list of holds that I have at the library. Having a stack of books that you’re excited to read always helps.
Only read good books. Now…by this I mean – Put a book down if you’re not interested. No one is giving awards for finishing books in adulthood. If you’re not into it, move on.
Read whenever you have a moment. Waiting for the pasta water to boil? Pick up your book. Waiting in the school pick up line? Pick up your book. Kids have soccer practice? Pick up your book.
Try not to reserve your reading time only to when you know you won’t be interrupted. After school, I generally get dinner going and then I take the boys out to play and bring my book with me. I know that they’re going to need help, and that I may only get two pages read, but it’s still reading time. Who knows – maybe you’ll get through a whole chapter!
Read instead of watch tv. This is similar to scrolling. You could choose to read a book instead of watch tv at night. My husband and I will watch a show together while folding laundry after the boys go to bed, but then I usually get my book out and he’ll switch to sports. I personally am not bothered by the tv being on when I’m reading, but I know that’s hard for some people. You could try to get your husband to read with you instead of watching tv! Or just go lay in bed!
If you work – read at lunch. Read at breakfast too! I have always brought my book to school with me and read while eating. It’s the half hour of my work day that centers, grounds and calms me. I look forward to it.
Get up early to read for a few minutes. Occasionally I am lucky enough to wake before the children and I will enjoy my first few sips of coffee with a quiet house, a simple breakfast and my book.
There you have it! My tips! I hope you find a pocket of your day for reading. Fit it in whenever and wherever you can. Reading and books are one of life’s greatest gifts in my very humble opinion.
Way back in April, I started planning out my May bakes. I’ve talked about my monthly planning process before, but if you missed it – I usually plan the entire month of bakes all at once. Usually one or two things a week – something dessert-y and something breakfast-y/afterschool snack-y. It keeps me on track and help reduce decision fatigue throughout the month. Having too many options isn’t always a good thing, for me at least.
Anyway, I knew that I wanted to do something super fun for the last day of school for the boys (and for me! lol). Cake? (Did that last year for the last day of school, so meh.) Pie? (A possibility, but I make a lot of pie during the summer, so I didn’t want to overdo it right off the bat.) Donuts? Now here, we had a real possibility. I’ve only made homemade yeast donuts one other time and they were gooooood, but I wanted to do something kind of wild. I wanted to make donuts in the shape of letters. Donuts with a message!! Please don’t give me all the credit for this idea though. It’s not that original. I’ve seen donut shops make letter donuts, and I’m sure I saw it on Pinterest long ago. And when I was researching how to do it, I watched a few helpful YouTube video tutorials. But could I do it? Well, obviously, I gave it a shot and they turned out SO CUTE. You guys, the possibilities are endless here!! You could make any message you wanted! What a cute centerpiece for a baby shower, a birthday party, anniversary, graduation party, etc. I mean like I said…endless. I wanted to jot down a few notes here for future reference for you (and for me) if you ever decide you want to give letter donuts a try.
If you’d like to read the full recipe from the original source at Delish click here. I used the “how to make donuts at home” recipe and it did not disappoint. The recipe comments were especially helpful when thinking through how to make the dough the best it could be.
I will jot the recipe down here too, just in case it ever disappears from their website. I also plan to add this recipe to my family cookbook (I just write all of our “keeper” recipes in one notebook to have all together.). This is one I will make again. I’m including my edits to the recipe here (less flour in the dough, more milk in the glaze) so if you want the original, go to their site!
Yeast Donuts
1 cup whole milk 1/4 cup plus 1 teaspoon granulated sugar, divided 2 1/4 teaspoons active dry yeast 4 cups plus 1/2 cup all-purpose flour, plus more for rolling 1/2 teaspoon salt 6 tablespoons butter, melted 2 large eggs 1/2 teaspoon vanilla Canola or vegetable oil, for frying
Grease a large bowl with cooking spray and set aside. In a small, microwave-safe bowl add the milk. Microwave until lukewarm, 40 seconds. Add a teaspoon of sugar and stir to dissolve, then sprinkle over yeast and let sit until frothy, about 8 minutes.
In a medium bowl, whisk together 4 cups of the flour and the salt.
In a large bowl or stand mixer, beat together remaining sugar, butter, eggs, and vanilla.
Pour in yeast mixture, mix to combine, then add in dry ingredients, stirring until a shaggy dough forms.
Turn out onto to a lightly floured surface and knead until elastic and only slightly tacky, adding more flour a teaspoon at a time if needed, about 5 minutes.
Form into a tight ball then place dough in oiled bowl and cover with a clean dish towel. Let dough rise in a warm spot in your kitchen until doubled in size, about 1 hour.
Line a large baking sheet with parchment. Alternatively if making letters: make sure that the donuts don’t lose their shape when moving them to the Dutch oven to fry, you can put donuts on individual squares of parchment paper and just gently tip them into the pot when you’re ready to fry.
Punch down dough, then turn onto a lightly floured work surface and roll out into a ½” thick rectangle. Using a donut cutter or 3” and 1” biscuit cutters OR letter cookie cutters, punch out your donut. Re-knead scraps together and punch out as well.
**To make letters, I just rolled out the dough a little thinner than 1/2″ and I used medium sized letter cookie cutters. The dough was a little tricky to get through all the way through cleanly with my plastic cookie cutters, so if you roll the rolling pin on top of the cookie cutters it forces it through and was so easy to get off. I think metal cookie cutters would probably work a little better if you need to buy some, but the plastic did work fine!
Place donuts and holes onto baking sheets, cover with dish towel, and let rise again, about 40 minutes more.
Make glaze: In a large bowl, whisk together milk, powdered sugar, and vanilla until smooth. Set aside.
Line a large baking sheet with paper towels. In a large dutch oven over medium heat, heat 2” oil to 350°. Cook donuts, in batches, until deeply golden on both sides, about 1 minute per side. Holes and small shapes will cook even faster!
Transfer donuts to paper towel-lined baking sheet to drain and cool slightly. Dip into glaze, then place onto a cooling rack (or eat immediately!).
I hope you guys try these!! In the shape of letters or not! They were declared delicious in our house.
Sometimes I have a hard time deciding if something is worth a blog post when a picture is really all you need, but I know lots of people like to see links for the exact things used in said pictures, so here we are with a helpful little blog post to make your own seed packet valentines! This idea came to me one morning on my way to school as I was contemplating valentine options along with my deeply rooted desire for a giant vegetable garden. The two came together as if fireworks were going off in my brain. The pun options! The seed packet options! I mean, really, what could be more delightful than getting this as a valentine? I decided to give these to friends and family, and the boys are making crayon hearts to give to their classmates. They’ve been tucked away in little kraft paper envelopes and are traveling across the states to be opened and smiled over by Monday. And just in time for seed starting season for my northern friends.
Phrases:
You’re the real dill.
I’m wild about you, valentine.
I love you from my head tomatoes.
Lettuce be friends forever.
Will you be my valentine even though you’re chamomiles away?
And if you need another idea – we’re making these for the boys’ valentines for school, but word to the wise – soak the crayons in warm soapy water for 15 minutes and the paper practically falls off.